Getting Started
So, you have decided to launch a website! Congratulations! You are on your way to starting your online presence whether it is for a blog, a small business, or creating a resource for others to follow. We’ll focus on the small business owner in the following sections, but that doesn’t mean this guide can’t serve you as well. It will show anyone just how to get started with their WordPress website. Let’s start by making some crucial first decisions!
WordPress.org vs WordPress.com
Maybe you have already noticed that WordPress offers two paths to get you started. The fully hosted, but greatly limited, version of WordPress includes an option for free website hosting along with upgrade plan options for fully hosted sites which can be found at WordPress.com. This path has pros and cons to be sure. There is a free option so one can take a test drive of the platform, but it is important to know that it is a highly managed environment without the full freedom that WordPress offers in the self-hosting model. You can’t use all the Plugins or themes out there, but they more or less guarantee that the ones they do let you choose from are always going to work. In some ways, it is a great option in that it is more or less guaranteed to work, but once you get into the paid tiers of the service, it makes far more sense to move into the WordPress.org self-hosted path.
So you are ready to host the version of the WordPress platform that gives you maximum flexibility at a much lower cost. Head on over to WordPress.org to learn more about what they offer in this path and what options you have for selecting your own themes and plugins. Please note, that most hosting companies offer the ability to install WordPress with just a couple of easy clicks. Below, I will detail how to get started with the full self-hosted version of WordPress with the hosting and domain provider NameCheap as they have excellent customer service and additional features to support your website. But, before we get started, we need to know where people will find you on the web!
Selecting a Domain Name
Okay, you are ready to get your website online. The first thing you will need to do is to select a domain name. It is pretty easy to get cutesy as you make the choice of a domain name, but you want to keep in mind that the easier the domain name is to remember, the more likely people will visit your website. In the Domain Name Settings (DNS) hierarchy, a top-level domain (TLD) represents the first stop after the root zone. In simpler terms, a TLD is everything that follows the final dot of a domain name. The TLD that most people will default to when typing in your website address is the .com website name. That is because this is where it all started and is therefore the most intuitive. It also means that these are the hardest domain names to land as the good ones are mostly taken. If you can come up with an intuitive domain name that isn’t too long and therefore hard to remember then this is your best bet when selecting your domain name. You can head over to Namecheap and try their domain search tools to find a name that is still available for purchase.
 It is important to have your own domain if you want to be taken seriously. Yes, you can have a free domain like pamcool.wordpress.com but you would be taken much more seriously if you just bought pamcool.com and it only costs about $10 per year to own your own domain, so it is well worth the investment.
Choosing a Hosting Provider
Okay, so now you are ready to host your WordPress-powered website on your own hosting platform. There are many to choose from and they have their pros and cons so if you want to do some research on which is the best service for you, here are some things to consider. Do they offer, a one-click install of WordPress from the back end? How fast do their servers load? Do they offer the ability to backup your website on a regular basis such as nightly backups? Do they offer a good backend environment such as the industry standard cPanel? Many hosts offer custom hosting environments that be hard to navigate and have limited functionality. We recommend NameCheap’s Shared Hosting environment for most website owners.
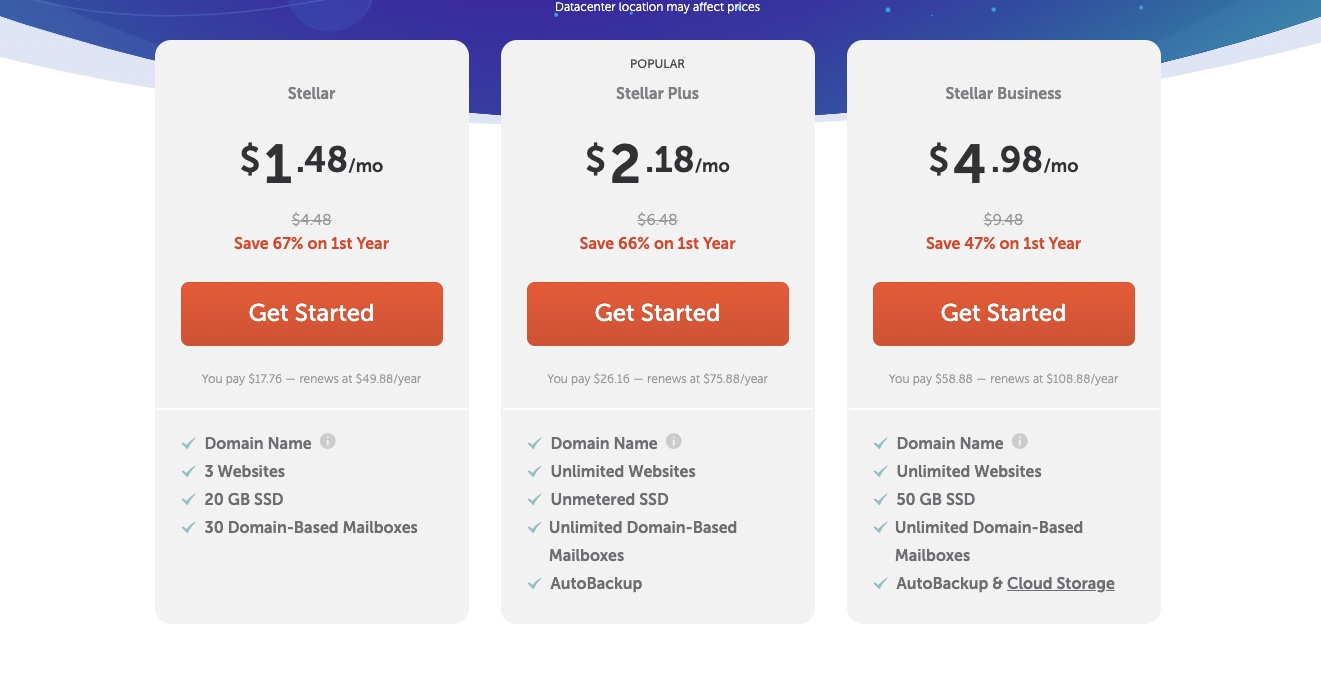 The Stellar Plus Plan will meet most hosting needs and offers its automatic backup service. For those who want to run their own WordPress-based newsletter with the powerful Mailpoet plugin, the Stellar Business Plan allows you to send up to 10,000 emails per hour through your newsletter. If you have a really large business with lots of traffic, you will want to opt for a dedicated hosting environment instead. One important piece of advice… signup for your domain name and hosting during the same cart transaction. This way, the two will get associated together automatically and save you the headache of learning how to make them work together.
Installing WordPress
Okay, you have your domain name and hosting account and you are ready to install WordPress to get your site online! You’ve taken some big steps already so you can feel proud of how far you have come so far. And now the fun part begins… installing WordPress and designing your website. Let’s walk you through how to install WordPress.
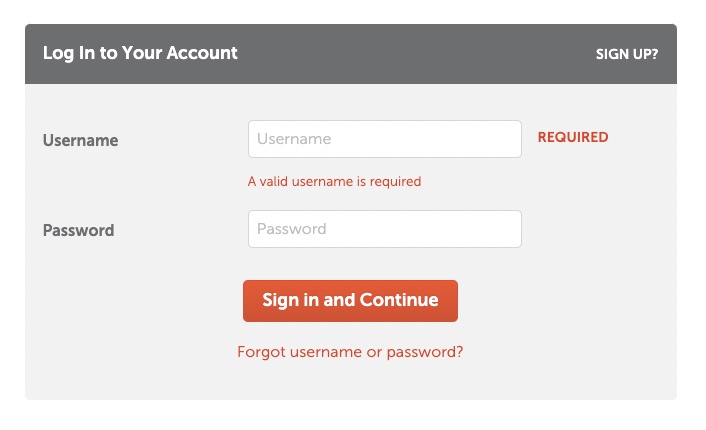
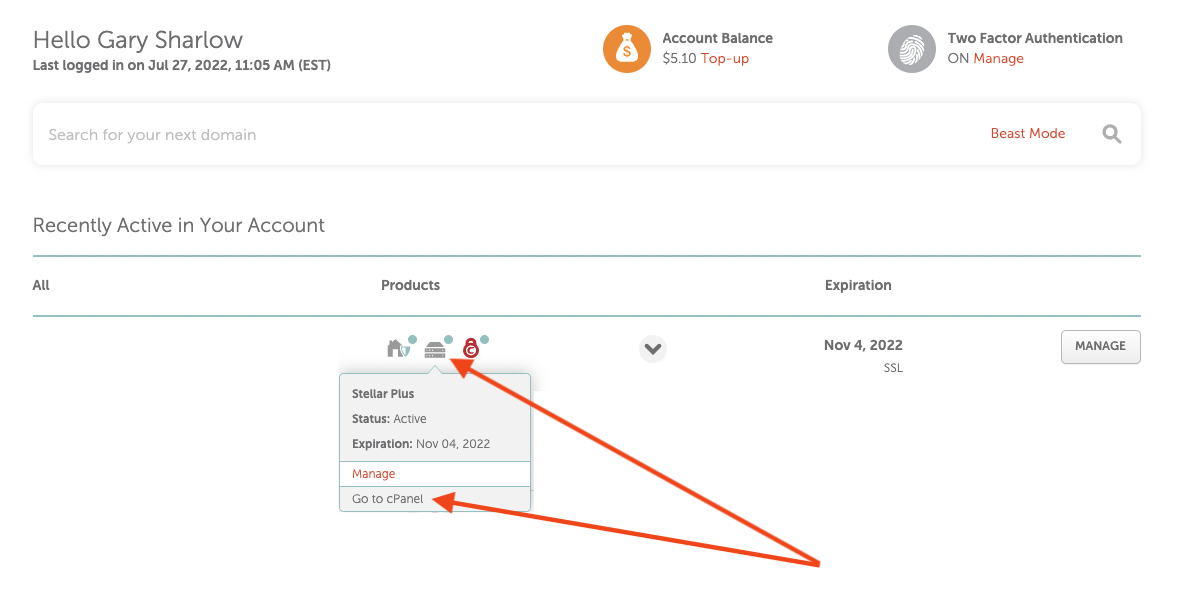
- You can start by logging in to your NameCheap Dashboard.
- Once you are logged in, you can click on the hosting icon and then click the link that says [Go To C-Panel] to get to the backend of your hosting environment.
- Now look for the section titled SOFTACULOUS APP INSTALLER and click on the icon for WordPress.

- Now you are ready to install WordPress onto your hosting account! Click on the [Install Now] button to get started. On the next screen, be sure to select https://www. In the first field and your domain name in the second field. Create an Admin Username and don’t use “admin” as your name. Then create a hard-to-crack password and continue through the options on the page. When you are ready, click Install to add WordPress to your website.

That’s it, you have installed WordPress into your website. Congratulations!!!
Selecting a Theme
You may have selected a theme during your installation process. If not, don’t worry. WordPress took care of it for you and installed a default theme for you to use. But, the real fun is in selecting your own theme and starting to design a website that is unique to you. There are many Visual Composers out there to choose from, but I recommend getting started with the Unicon theme as it includes the WPBakery PageBuilder bundled with the theme. And, it is by far the most intuitive page builder with the greatest amount of flexibility for designing your site the way you want it. It is also very lightweight in its code and comes bundled with the most basic features that you are almost certainly going to want to use at some point in your website journey. But, you are also free to select from thousands of free starter themes and try your hand at building your own site at absolutely no cost. That’s the beauty of WordPress. It is open-source and there are 1000s of free themes and plugins to add functionality to your website. The only cost is the value of your own time in learning how to build your site. If you don’t have time to spare, you can always hire a designer who has spent years honing their skills and can rapidly build the site of your dreams! Consider this a shameless self-plug as I would love to design your website with and for you! 🙂
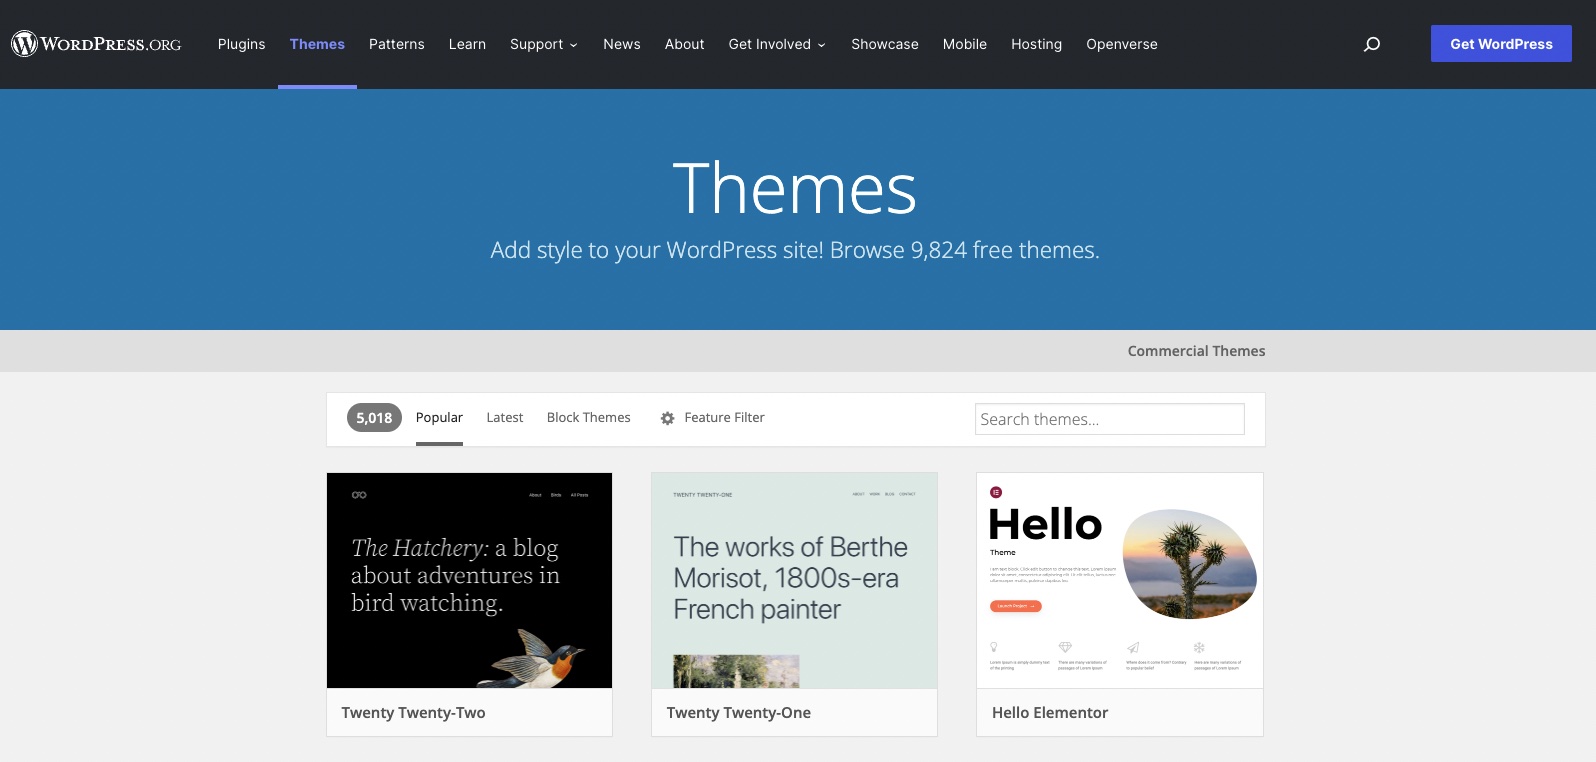
You can add popular free themes from the backend of your WordPress site.
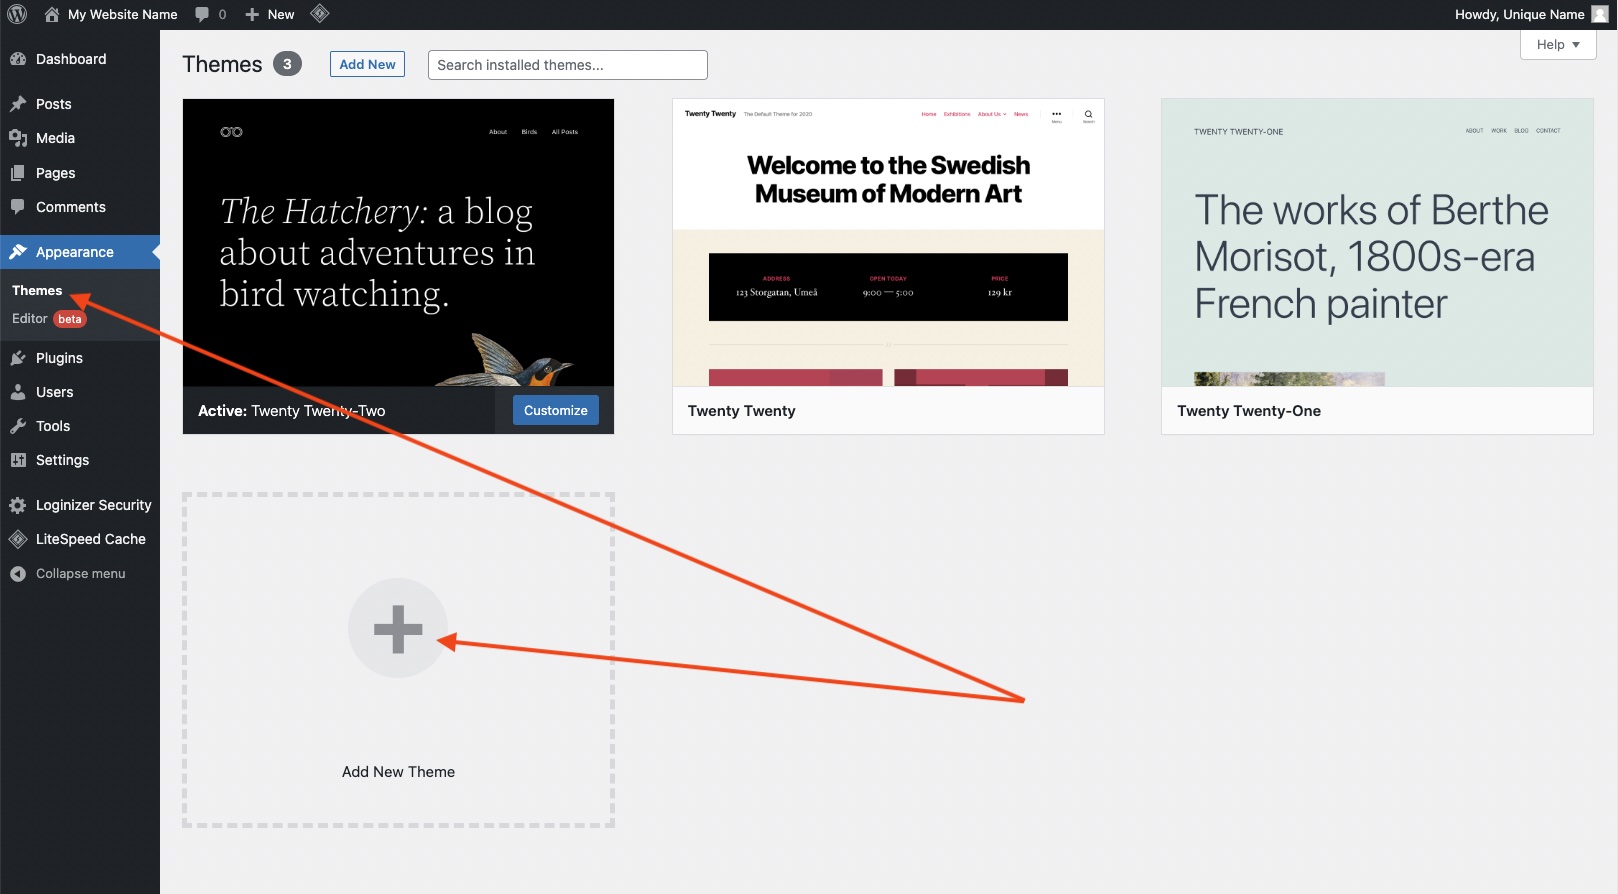
You can review free WordPress themes from their repository.
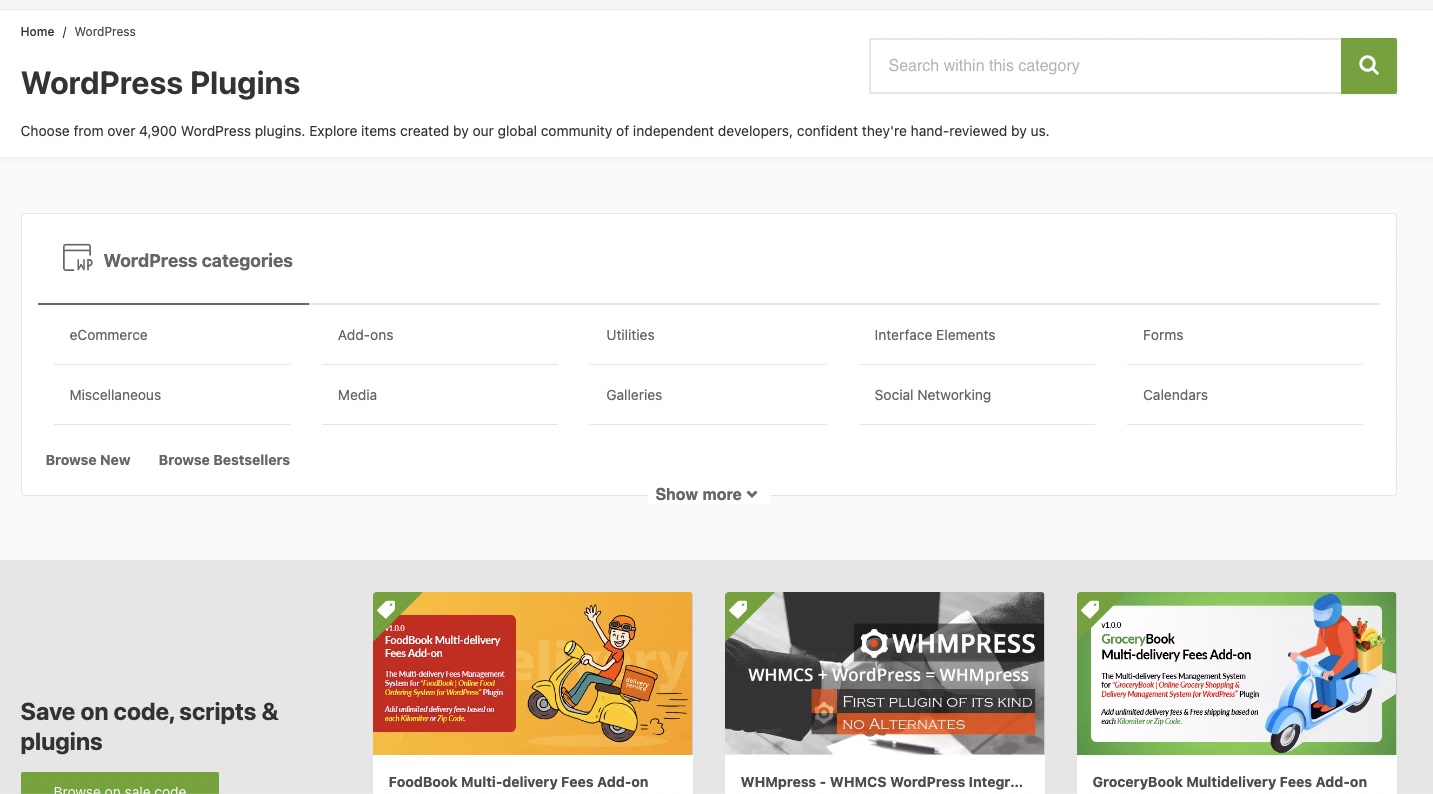
You can look through the web for premium theme repositories such as ThemeForest.
Selecting and Installing Plugins
Okay, so now you have your WordPress website set up with the CMS installed and you have selected a theme. The next step is to design your site which includes adding features and functionality through plugins. You can visit the WordPress repository for a selection of free plugins and also look at premium repositories such as Themeforest.
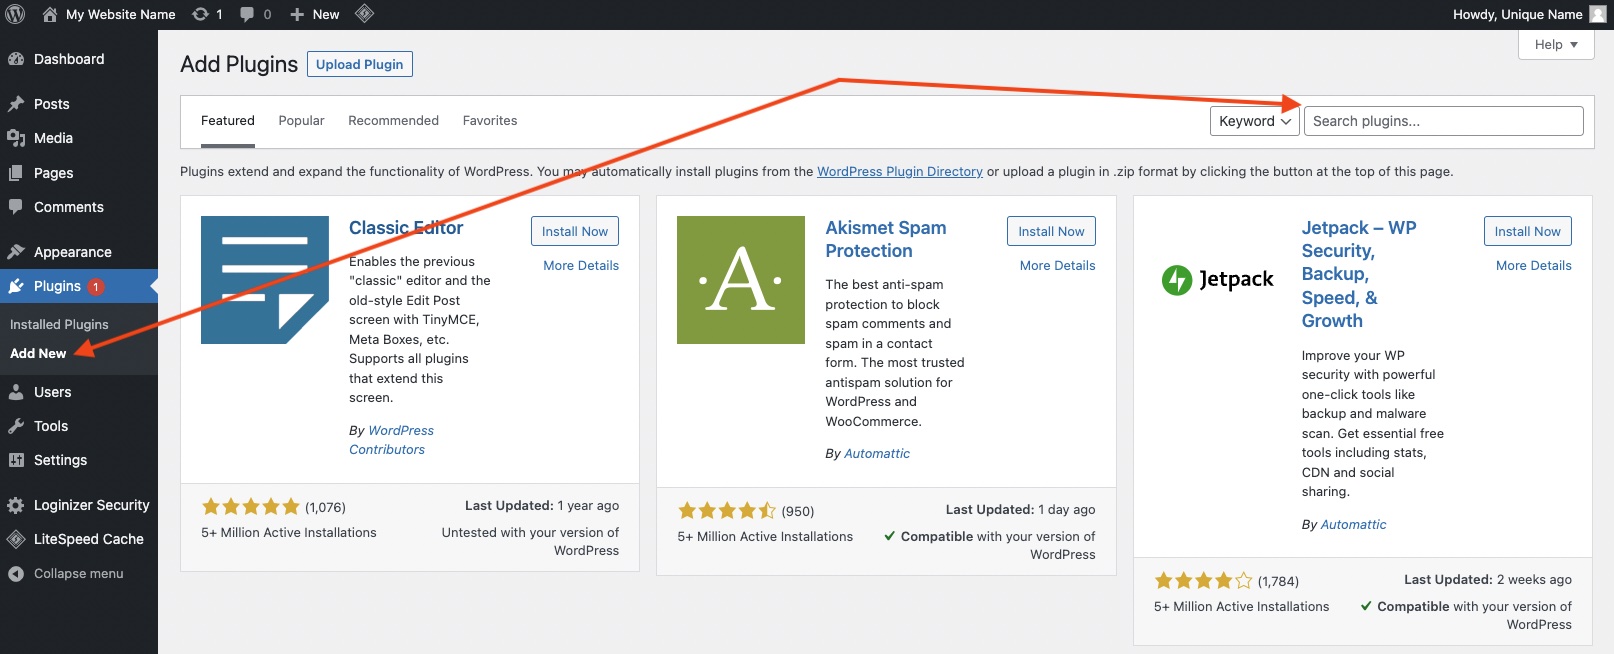
The easiest way to get started with installing plugins is to do so from the WordPress admin area on the backend so that WordPress automatically installs the plugins for you.
Creating Your First Set of Pages
Now that you have WordPress installed, you’ve selected a theme and you have installed some plugins to add functionality, you are ready to start adding content to your site. There are a few different ways to add content. You can add pages and posts to get started. Once you move into a more advanced website, you can also add things like events if you have a calendar plugin that you would like to use or products if you choose to sell products or services through the popular Woocommerce store plugin built by and for the WordPress team and CMS.
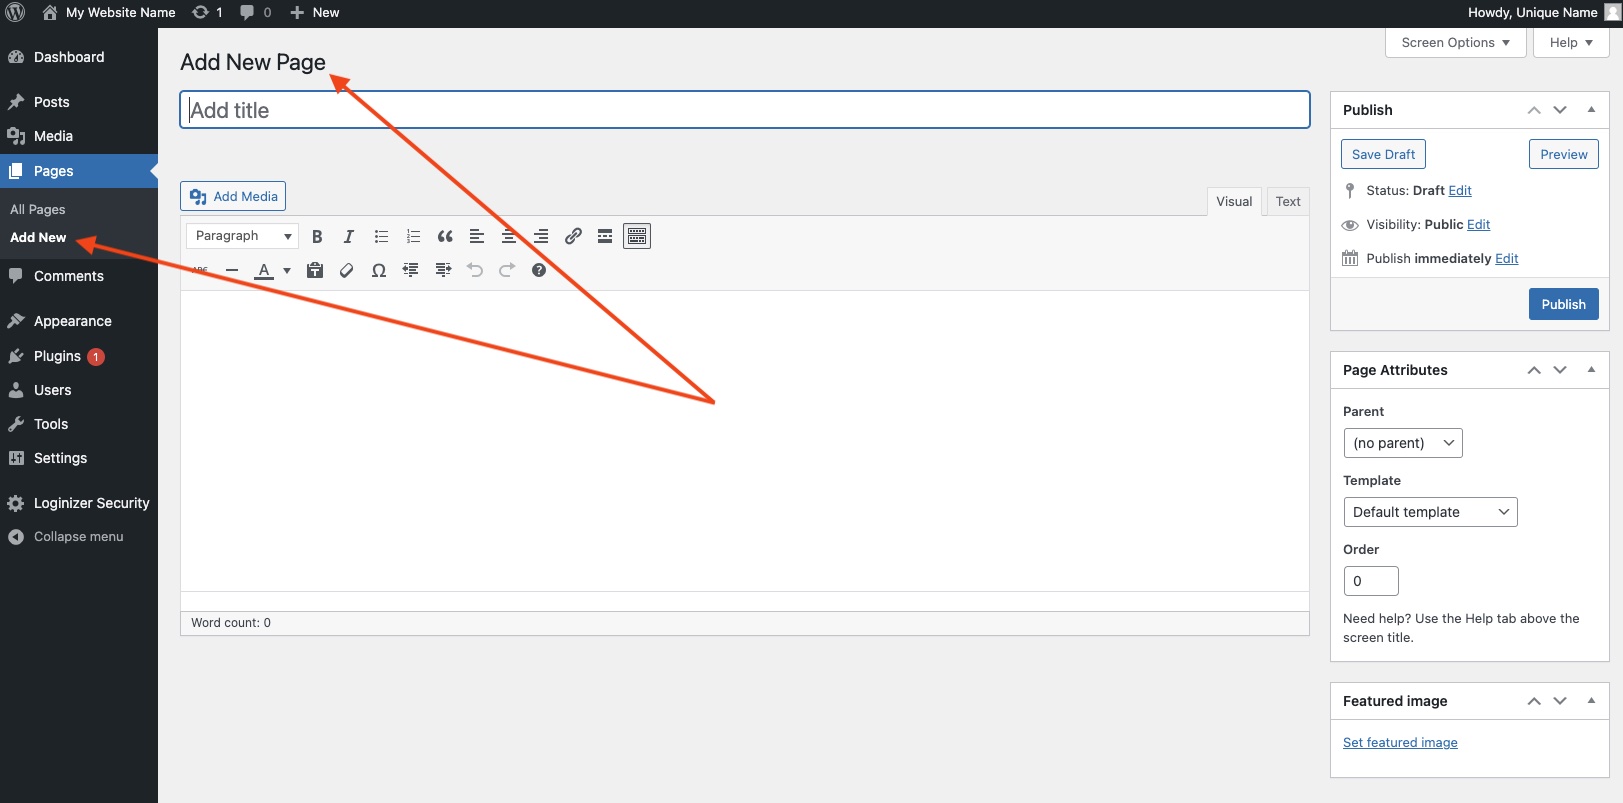
Let’s start with creating a homepage in the format of what WordPress calls a “page”. The main pages of your website such as your homepage, about me page, contact page, etc. will take the form of a “Page”.
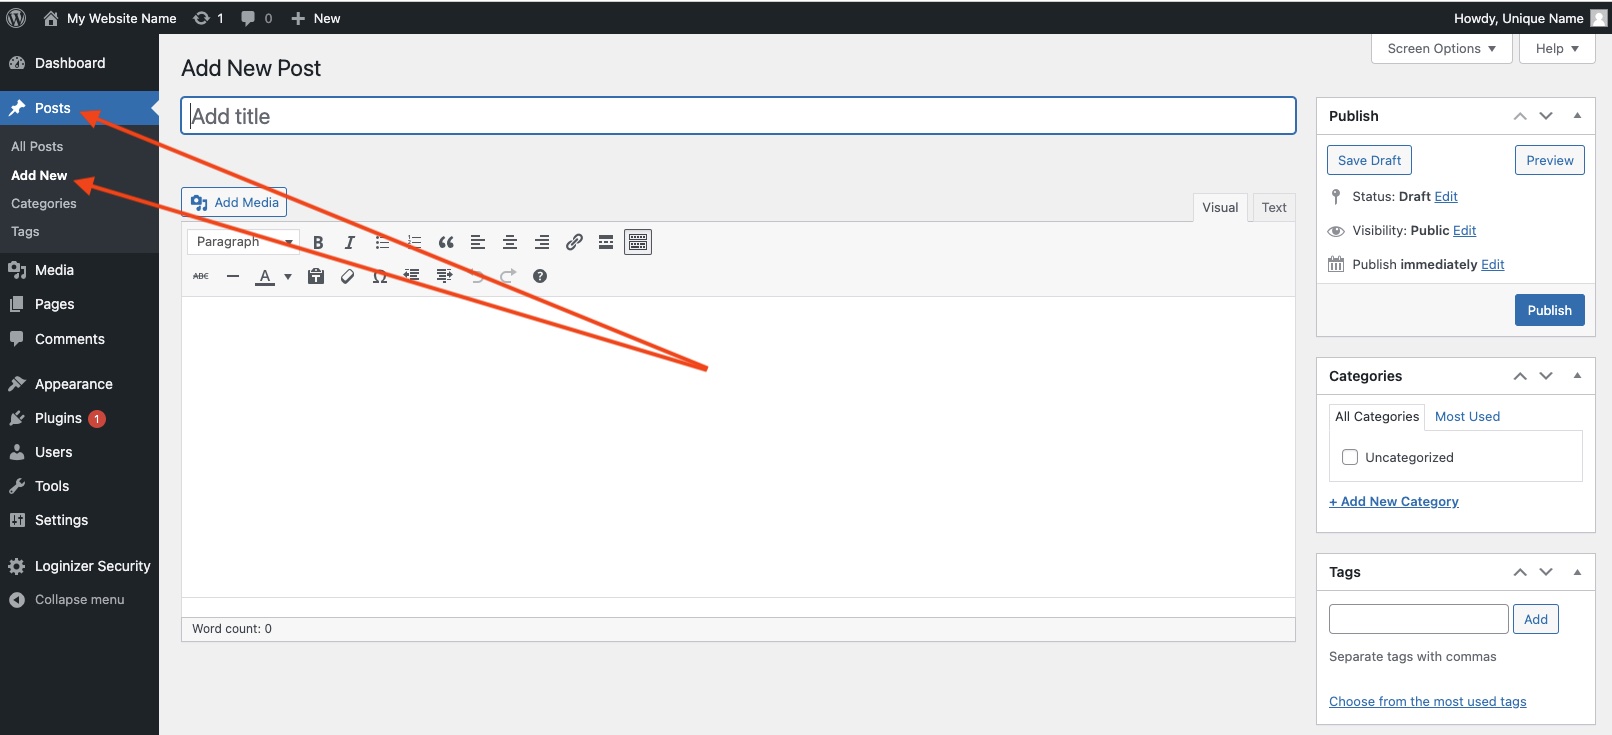
Now, let’s look at how you add a blog post to your site. WordPress refers to these pages on your website as “Posts”.
Total Design Freedom
Now that you have a domain name, hosting account, have installed WordPress, selected a theme, and learned how to add your first pages, it’s time to really start designing your website and adding your content. With the Unicon Theme and WPBakery visual designer along with the myriad of free and premium plugins at your disposal, the sky is the limit with what you can do with your website. Take a look at my Design Tutorials for ideas of things you can do to design your website or contact me today to discuss hiring me to build your website for you.


